Manage your input files
A specific page is available on the platform to manage all input files. Several types of files are useful for the Bots to obtain constant input values or a geometry for the design environment:
- Geometry files in STEP, STP, or STL formats
- Data and Excel files in CSV or XLSX formats
This page is accessible on the platform by clicking on the My Files menu.
1. Understanding the page layout
When accessing the My Files page, the user encounters a specific interface with several available features. The following example illustrates the possibilities:
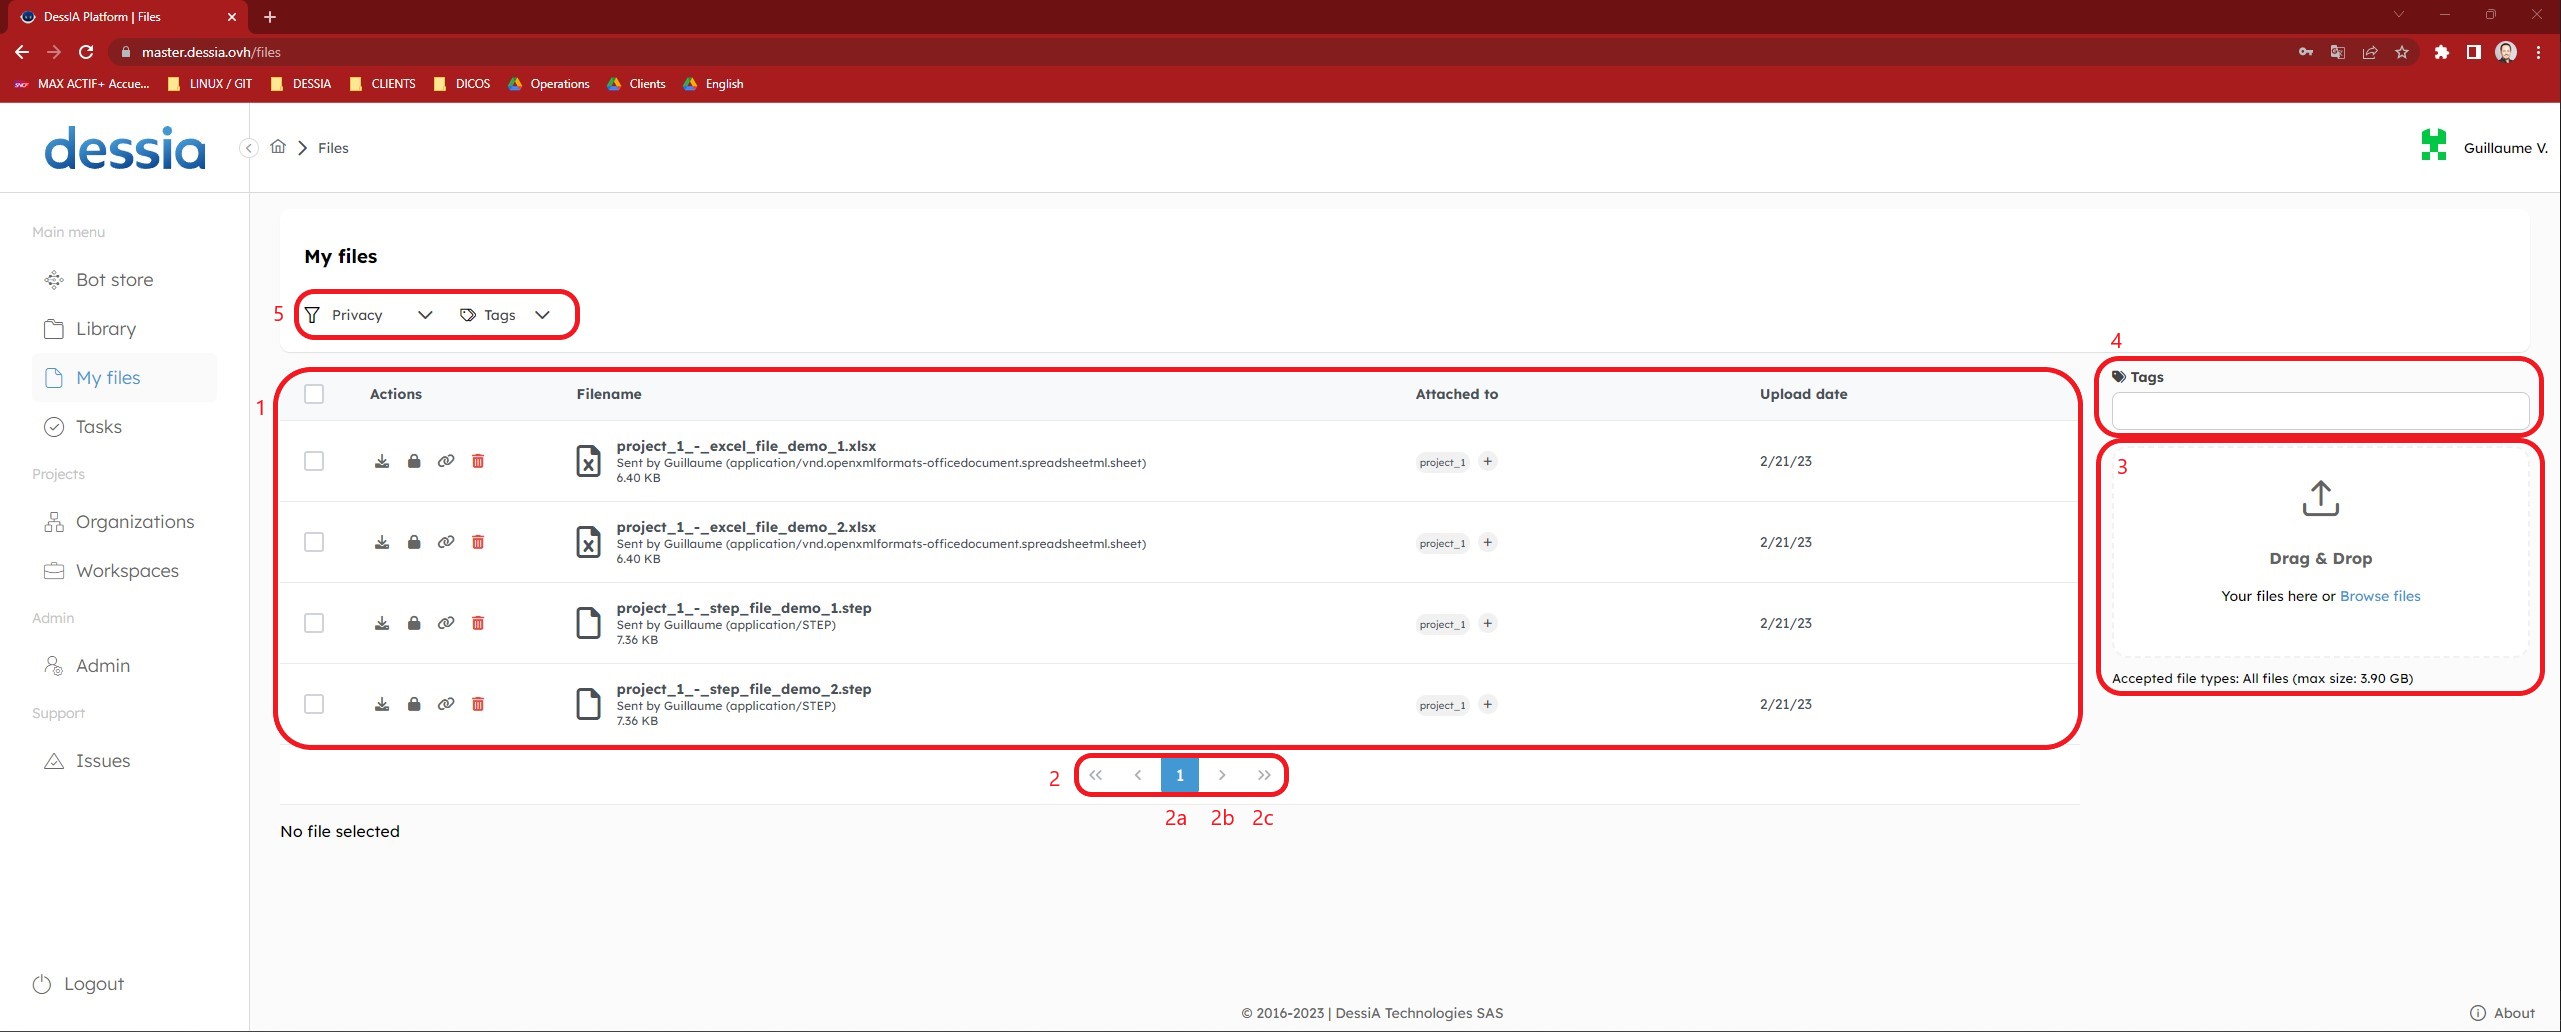
- The visualization block shows all the already imported files. The user can select files, take actions, add tags, and view specific file information such as name and upload date.
- A list of buttons facilitates navigation through potentially numerous
imported files:
- a. Button 2a redirects to the first page when clicked (for button “1”), second page (for button “2”), and so on.
- b. The lone arrow from button 2b redirects to the next page when clicked (for example, if the user is on the first page, it redirects to the second).
- c. The two arrows from button 2c redirect to the last page of the list (for example, if ten pages are available, clicking on this button will redirect the user to the 10th page).
- d. Similar options to buttons 2b and 2c are available to go back to the previous page.
- A block used to import files through drag-and-drop or by opening a browser. The file format or size limitations are given as information for user awareness.
- A block used to create tags for file management.
- A set of two filters used for ordering or filtering already imported files:
- a. By the access given to a file: public or private access.
- b. By the tags given to files.
2. Importing files
Several options are available for the user to import their input files.
a. Import with drag and drop
To import files through the drag and drop option, follow these steps:
- Open your My Files page by following the instructions previously introduced.
- Open a page of your computer's file explorer in the folder where your files to be imported are stored.
- Select the file (or a list of files) you want to import in your computer file explorer.
- While holding down the left click, drag and drop your selected files in the platform's dedicated area.
- Track the progress of your file import by checking the green (success) or red (failure) message on the top right-hand side of your window and the files displayed on the current page.
Note that you can import files of different formats at the same time.
b. Import with browser
To import your files through the browser window, follow the instructions below:
- Open your My Files page by following the previously introduced instructions.
- Left-click on the blue Browse your file link in the dedicated area of the current page.
- A page will redirect you to your computer file browser to allow file selection.
- Move to the directory where your imported files are stored.
- Select the file (or list of files) to be imported.
- Click on Open.
- Track the progress of your file import by checking the green (success) or red (failure) message on the top right-hand side of your window and the files displayed on the current page.
Note that you can import files of different formats at the same time.
3. Imposing tags
a. Introduction
Tags are used on the platform to help the user easily store, find, and manage their imported files. These tags may correspond to specific user identifications, projects, Bot dedications, or any other specific user needs.
There is no restriction on font for tag names, but it is recommended to use names without spaces (use the underscore key "_") and avoid special characters.
b. Imposing a tag (or several tags) while importing a file
To impose one or several tags while importing your files, follow these instructions:
- Open your “My Files” page following the previously introduced instructions.
- Depending on the importing method you choose (browser or drag and drop), open the computer file explorer.
- In the dedicated Tag field, enter the first tag name.
- Press Enter.
- Repeat steps 3 and 4 for each tag you want to impose on the files you are importing.
- Depending on the importing method you choose, drag and drop the files or open the browser to select the files to be imported.
- (Left-click Open after selection for the browser option.)
- Track the progress of your file import by checking the green (success) or red (failure) message on the top right-hand side of your window and the file display on the current page with the imposed tags.
If you encounter an error, don’t hesitate to refresh the page by pressing the "F5" key and start the process again.
c. Imposing a tag to an already imported file
In order to impose a tag to an already imported file, one requirement is necessary:
- A file with the same tag has to be available in the files database.
- In other words, if the tag the user wants to impose on the already imported file is a brand new one, the user has to re-import this file following the previous section instructions (b. Imposing a tag (several tags) while importing a file).
For example, a file without any tag has been imported while other files with specific tags are already available in the database.
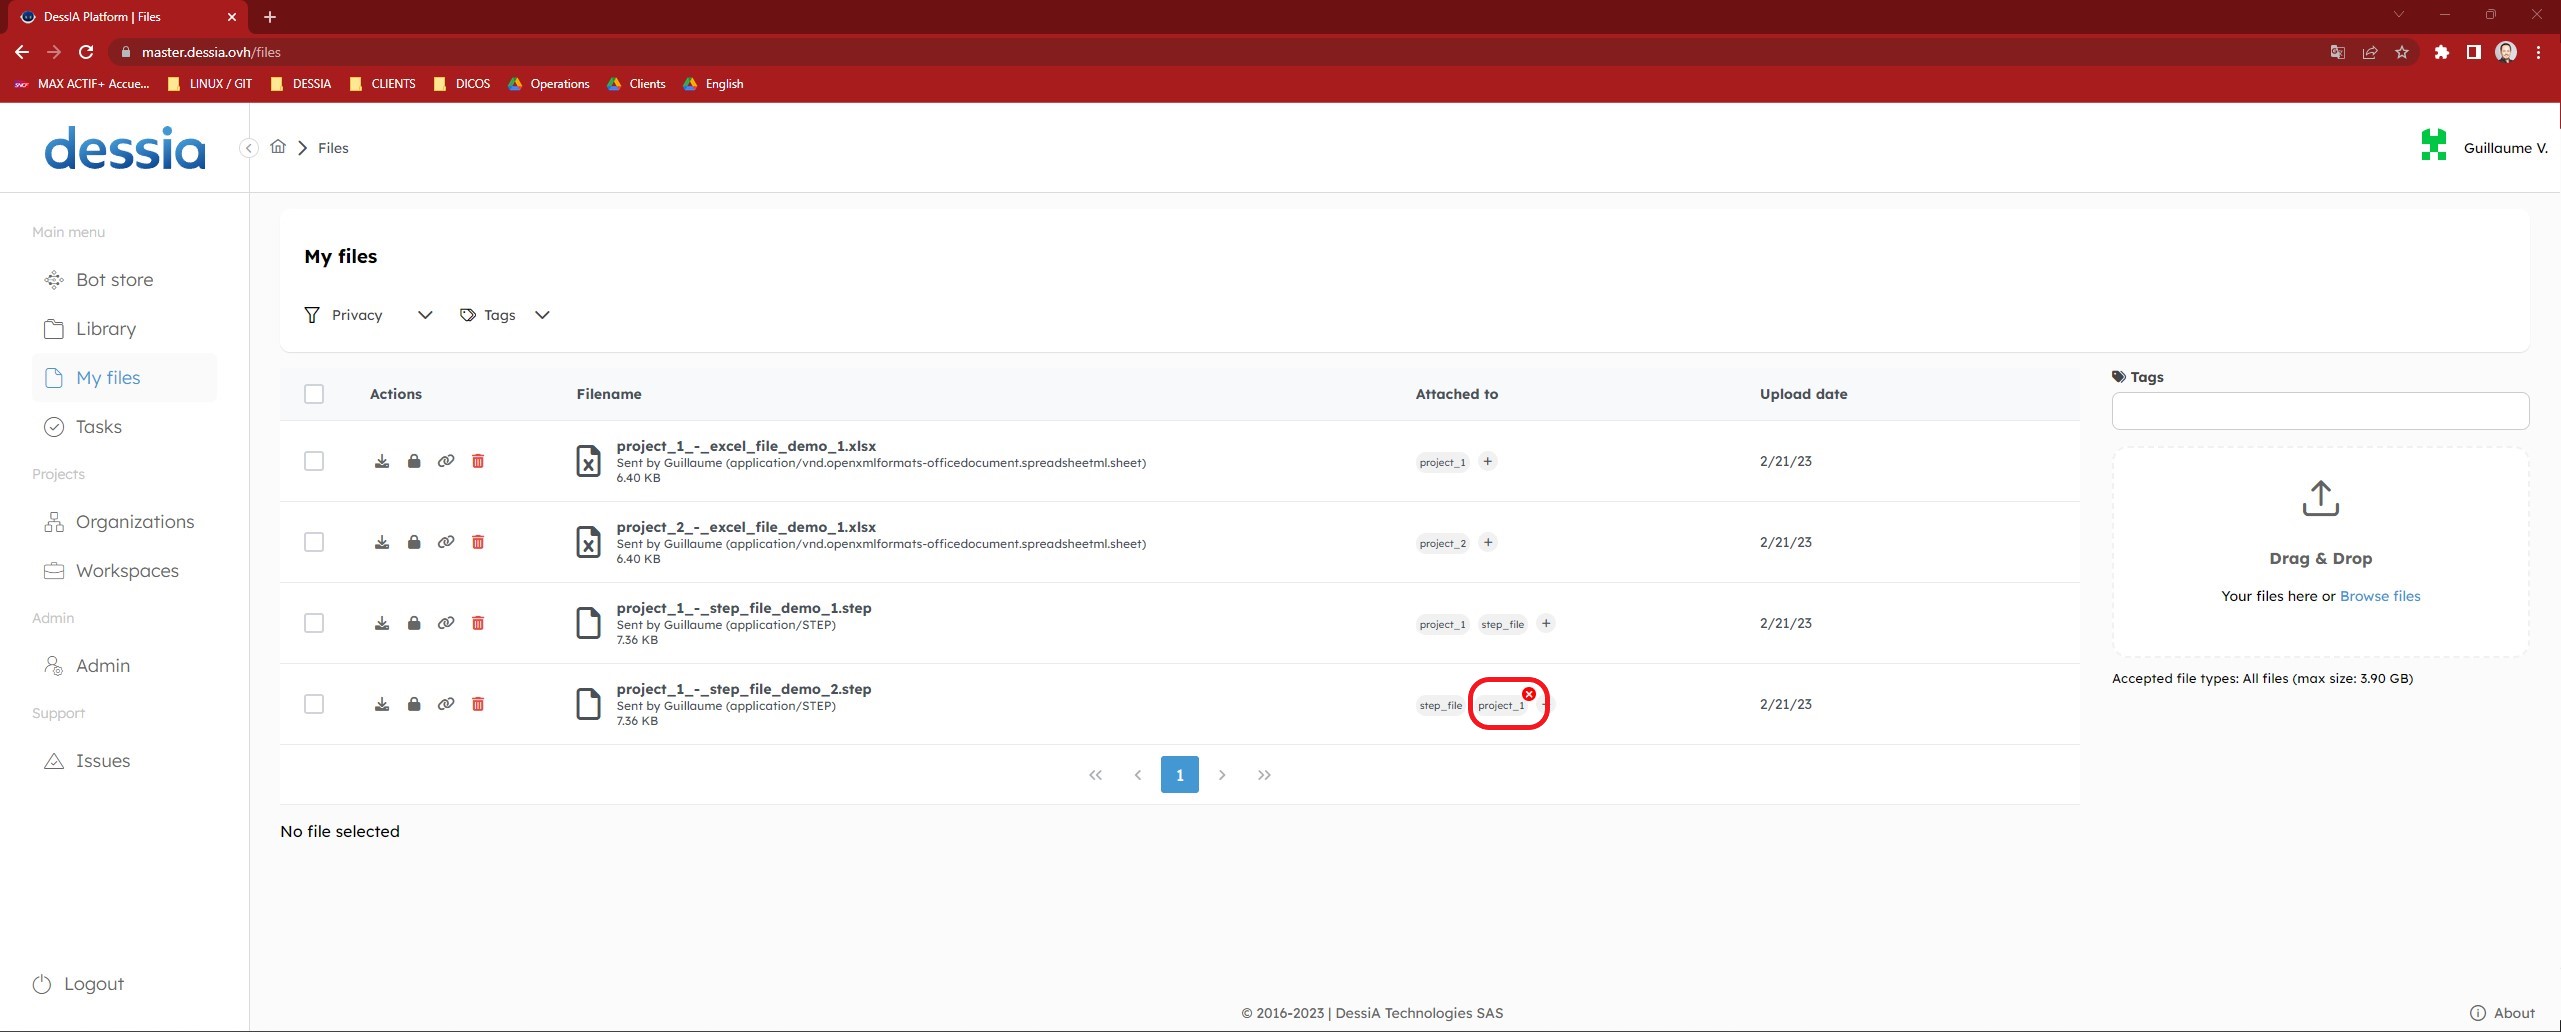
d. Deleting a tag from a file
To delete a tag from a file, left-click on the top right-hand side red cross available on each file tag.
4. Managing your files through actions
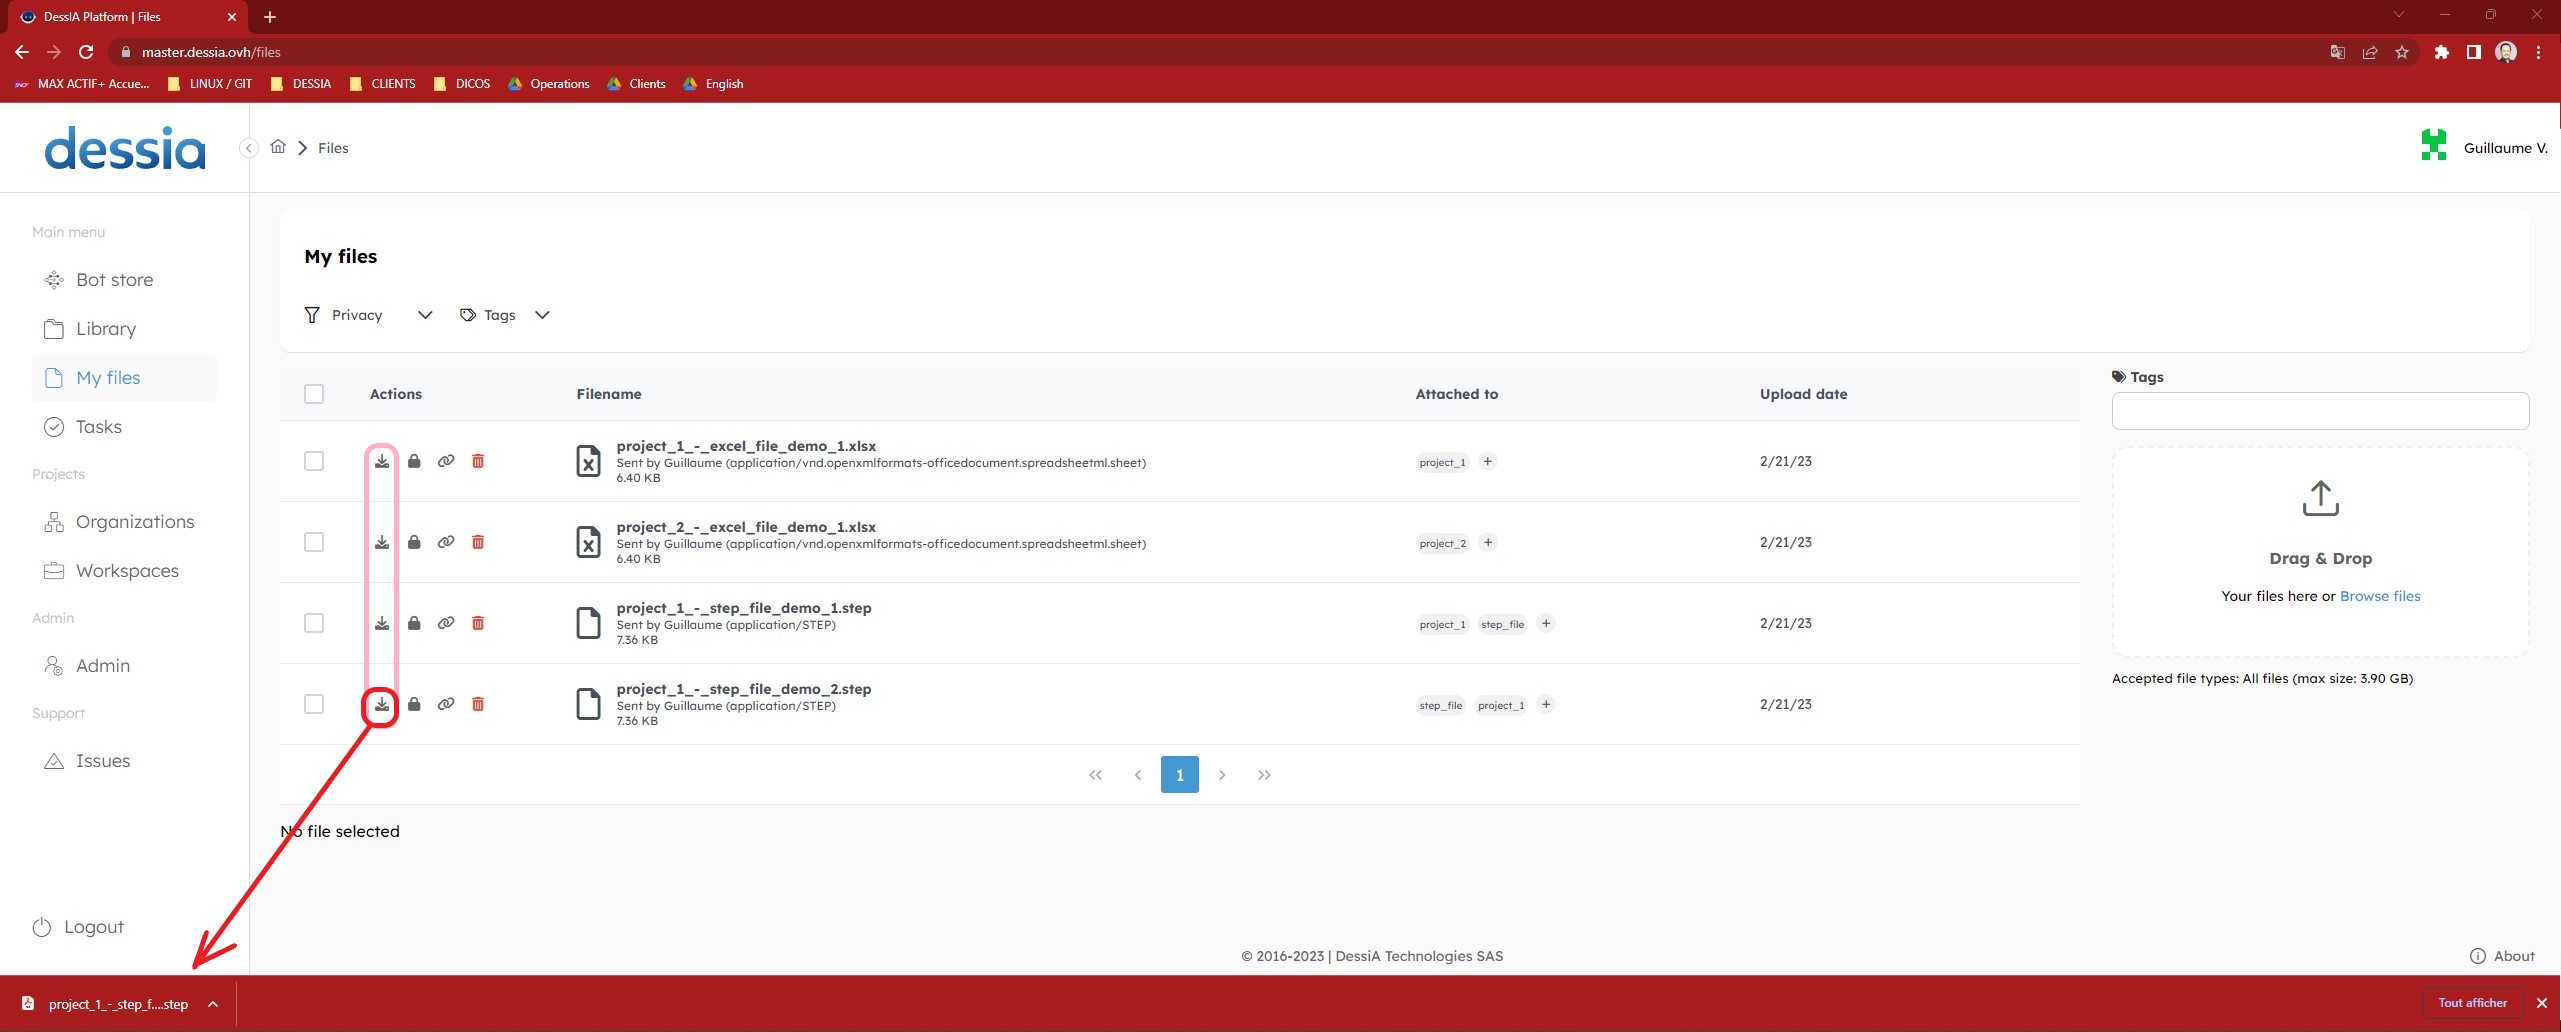
a. Downloading a file
If a file is available on the platform, it can be downloaded. Each file must be exported manually and individually since the selection and multiple download features are not enabled.
To download a file, follow these instructions:
- Open your My Files page using the previously introduced instructions.
- Left-click on the download icon of the file you wish to export.
- Track the download in the usual web browser interface.
- Find the file in the usual computer download folder.
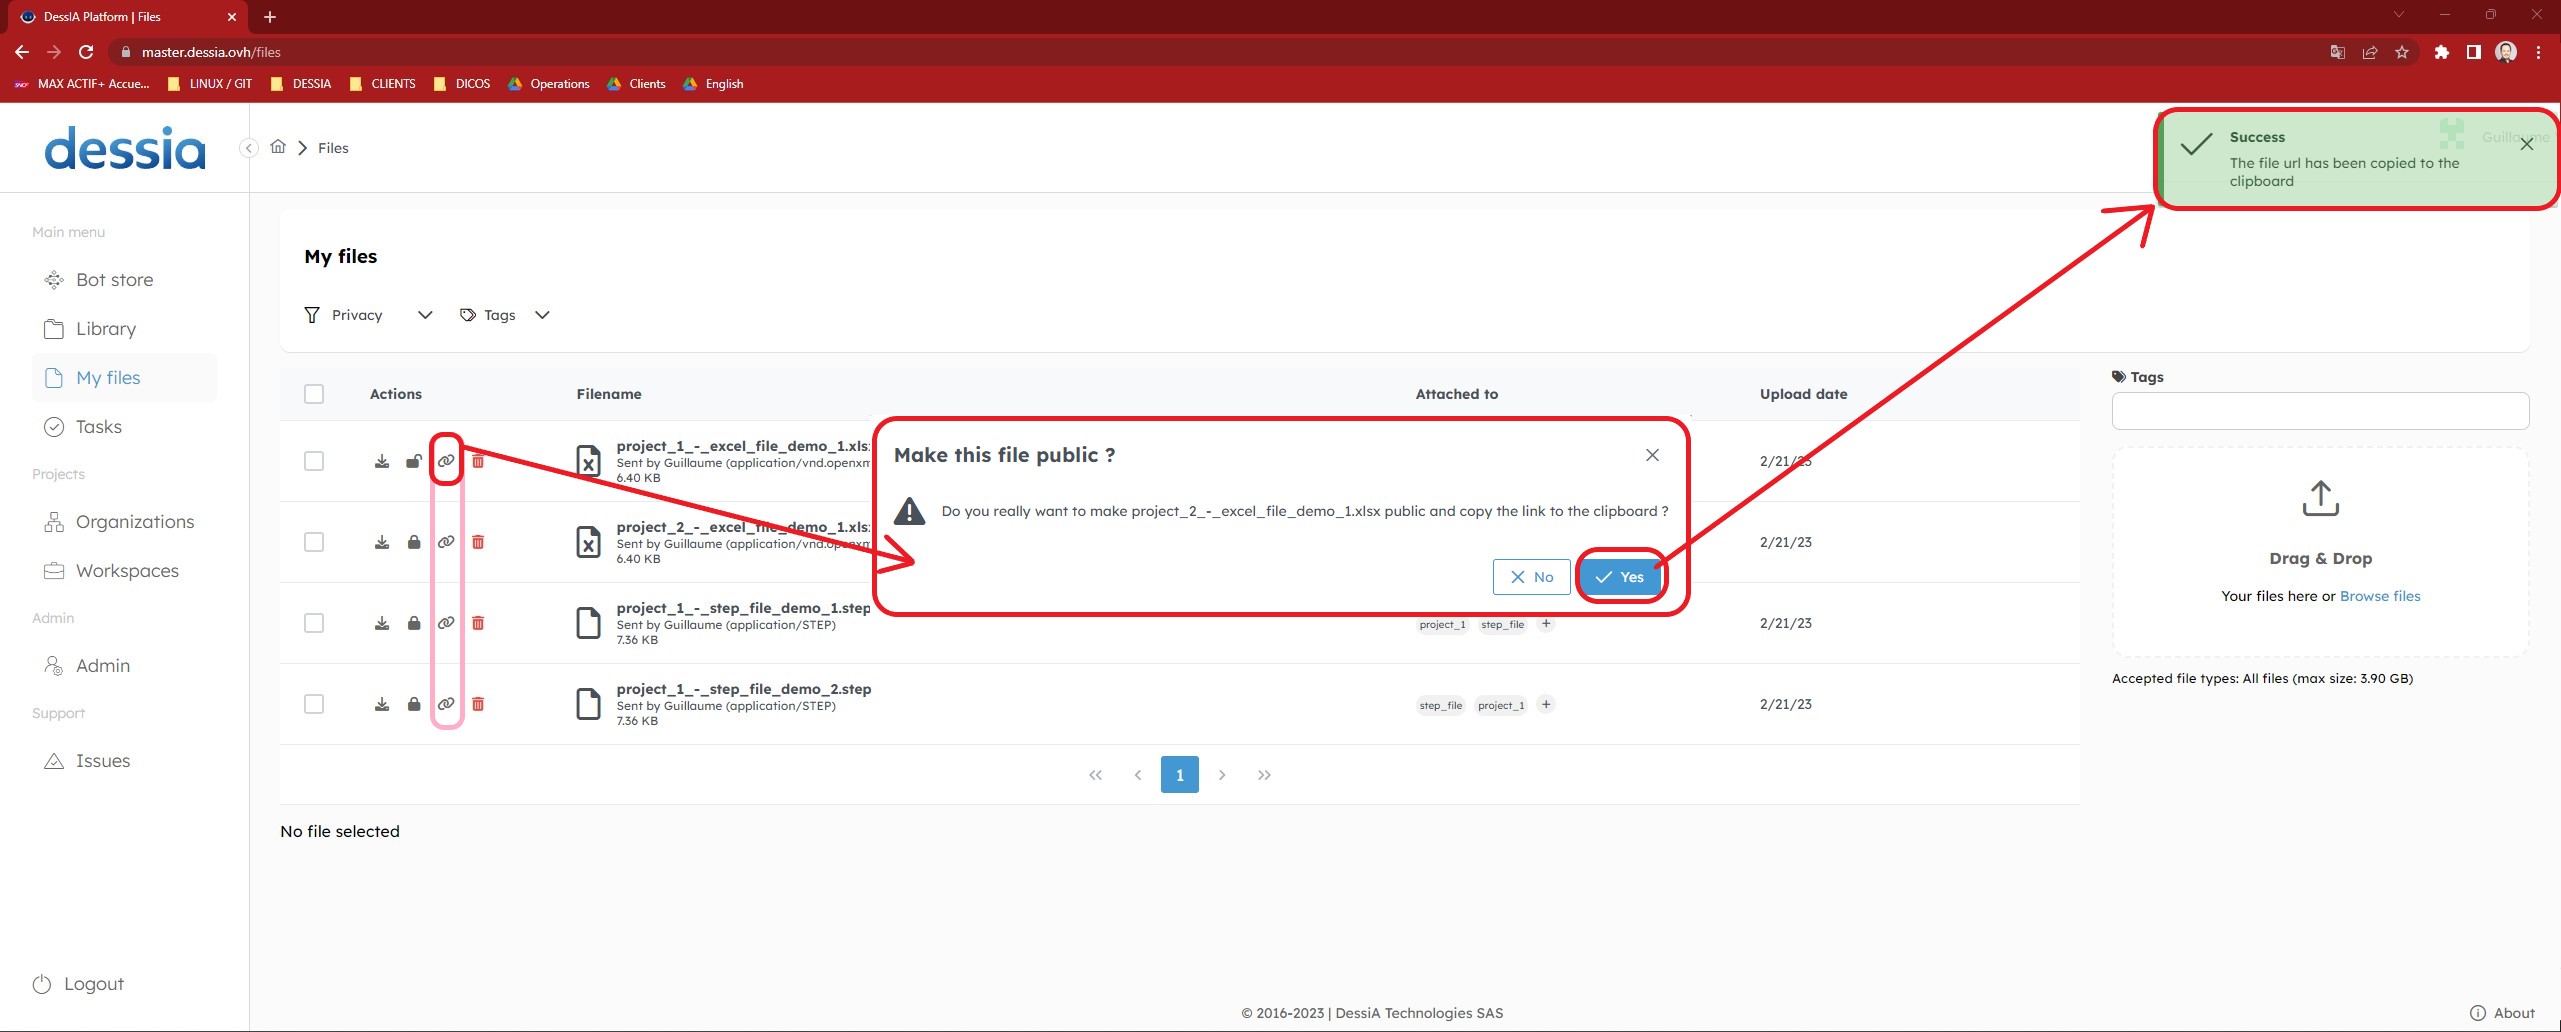
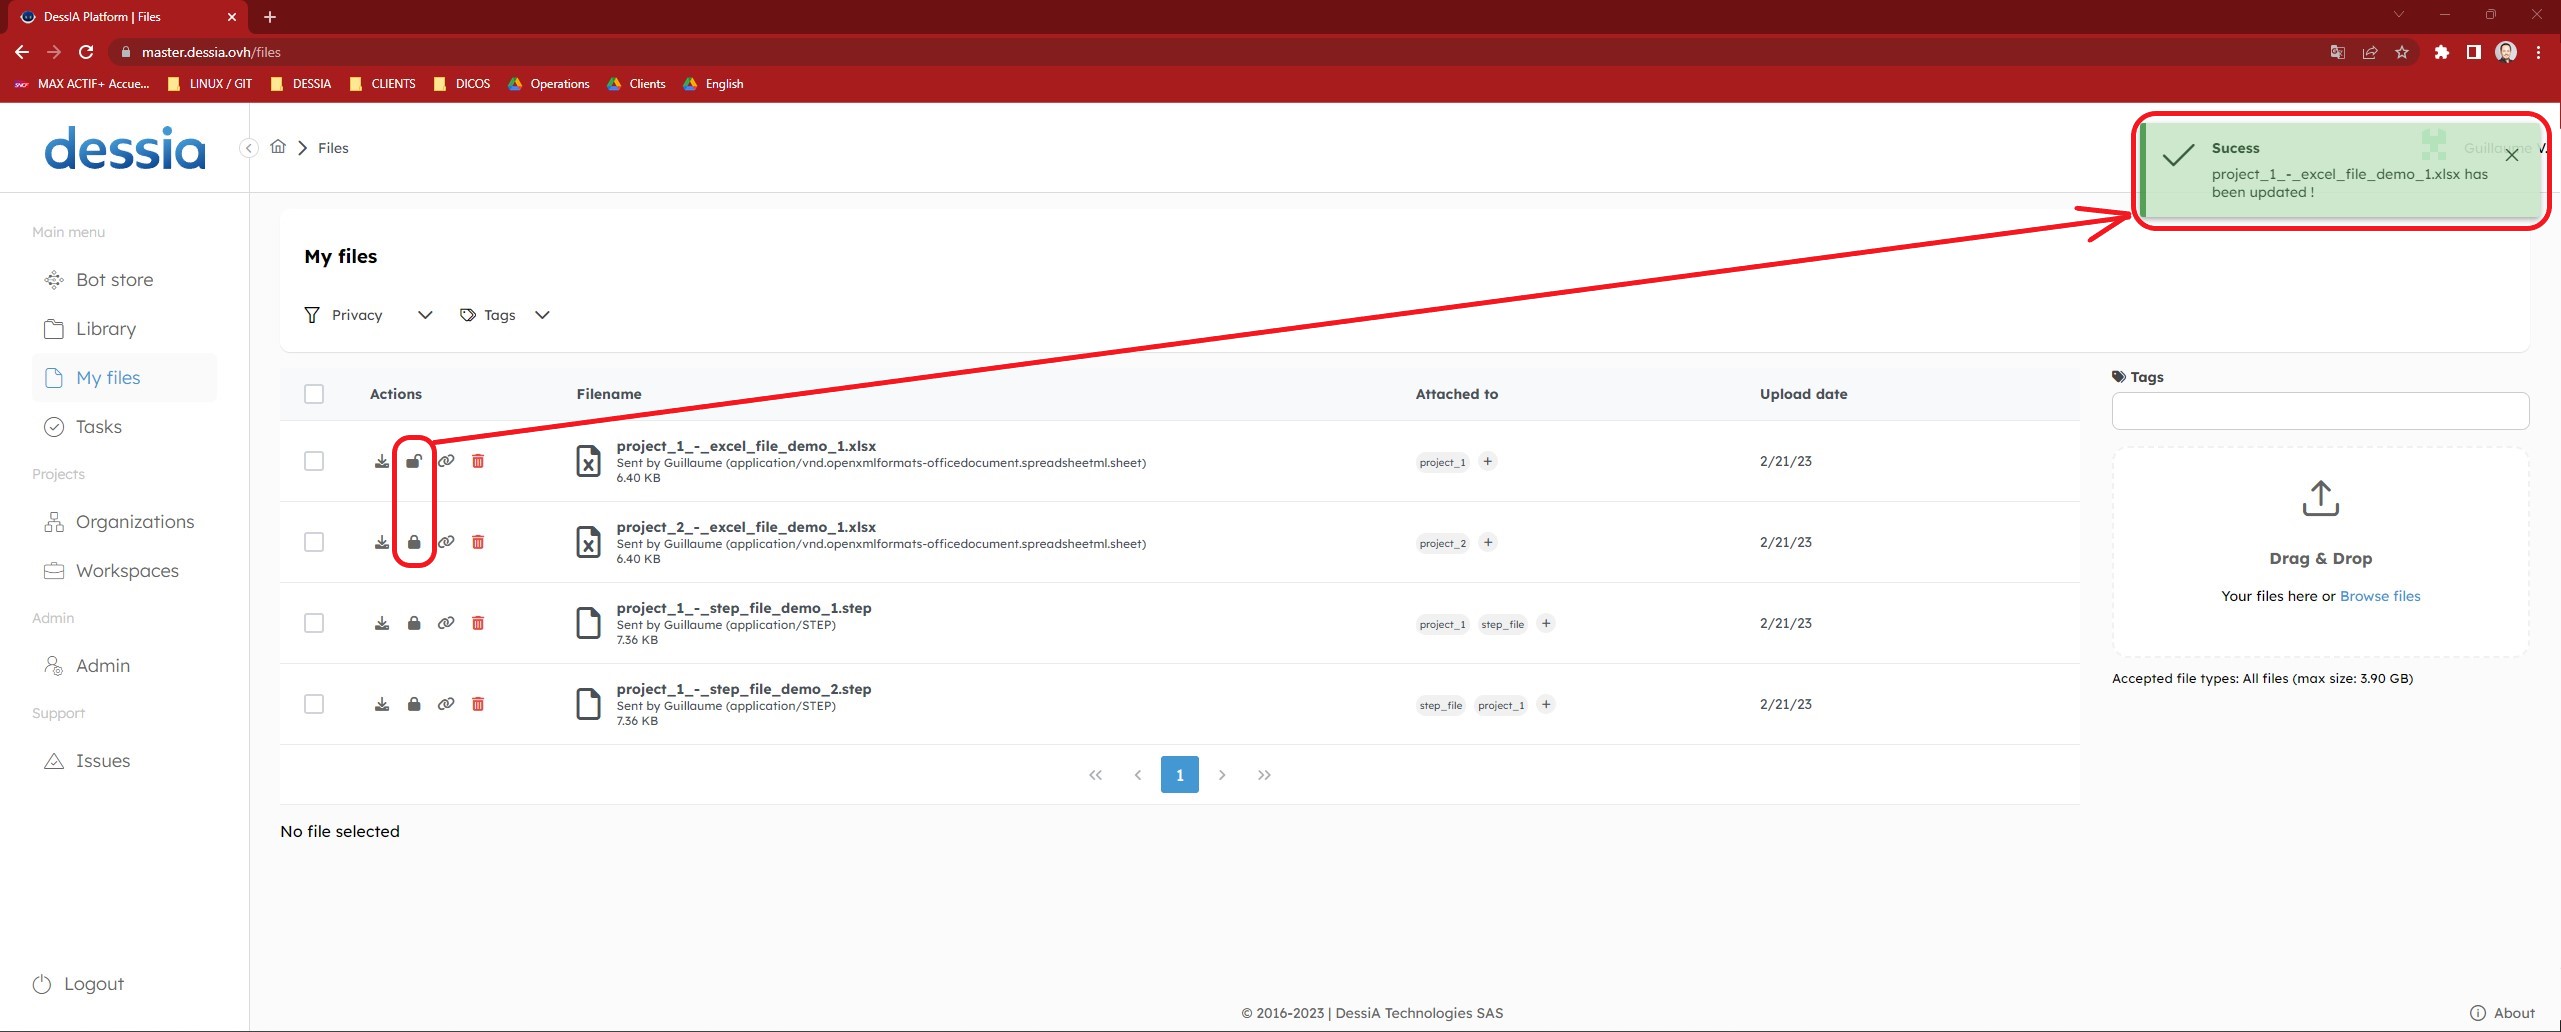
b. Managing files public access
Imported files are private by default, meaning that only the user who imported the files can access them. However, it is possible to change their access restrictions to public by left-clicking on each file's dedicated icon. A message confirms that the action has been taken into account.
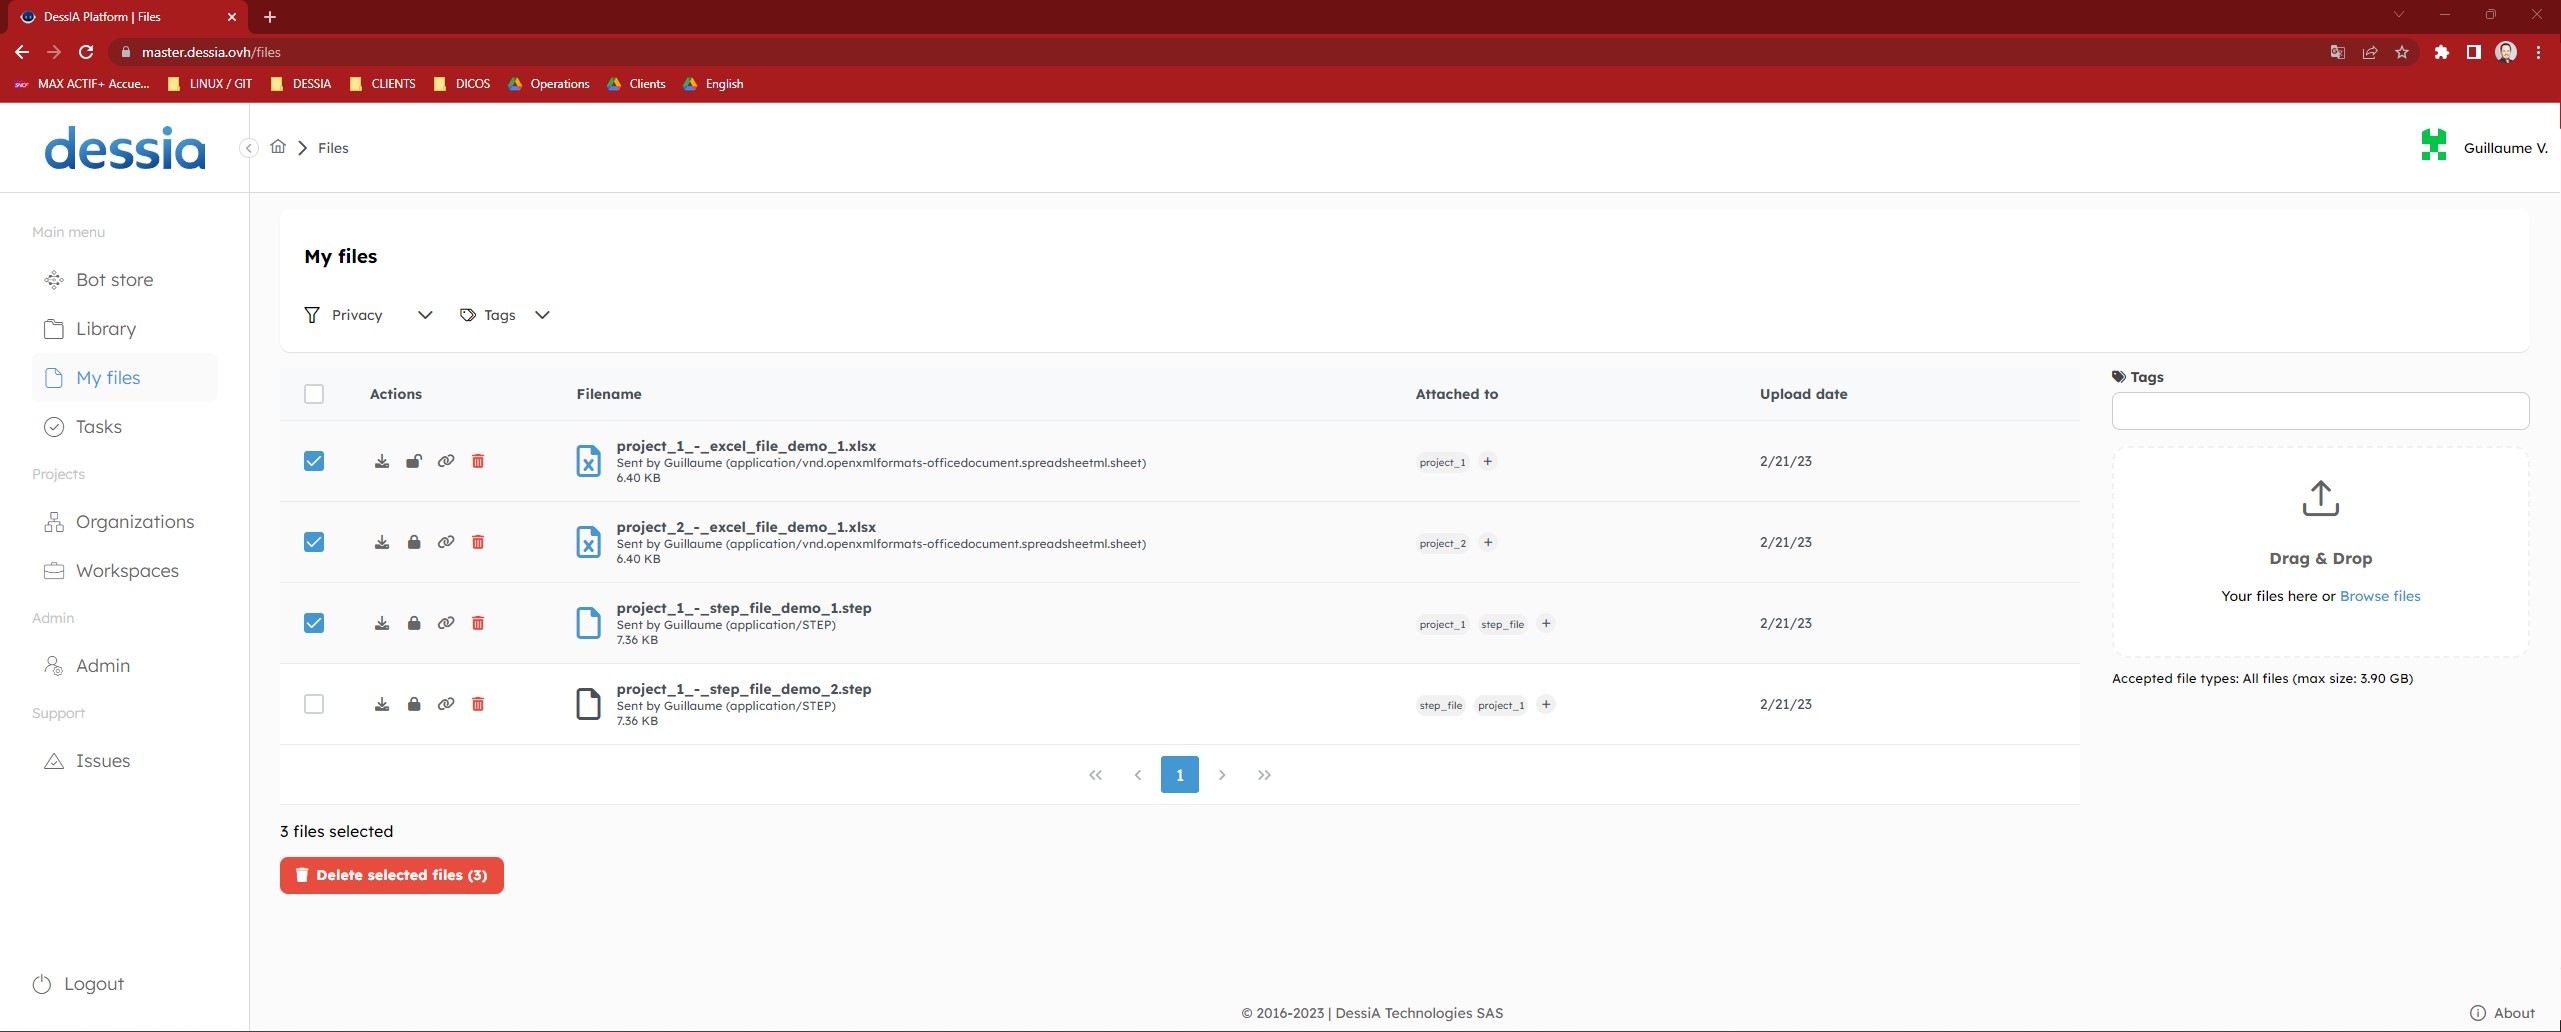
c. Deleting a file or a group of files
Files can be deleted individually or in a group:
- To delete a single file, left-click on the dedicated red bin icon for each file you want to delete.
- To delete multiple files, check the specific file boxes to be deleted and click on the red button Delete selected files that appears at the bottom of the current window.
d. Sharing files
To share files, a feature is also available. Note that this option activates the file's public access while copying its link to the clipboard for sharing.
A green message on the top right-hand side of the window confirms that the file URL has been copied to the clipboard and can be used for sharing.