Master 2D and 3D displays
This page explains what are the different buttons that can be found on the
plot_data display and 3d view (CAD view).
1. Plot Data (MultiPlot)
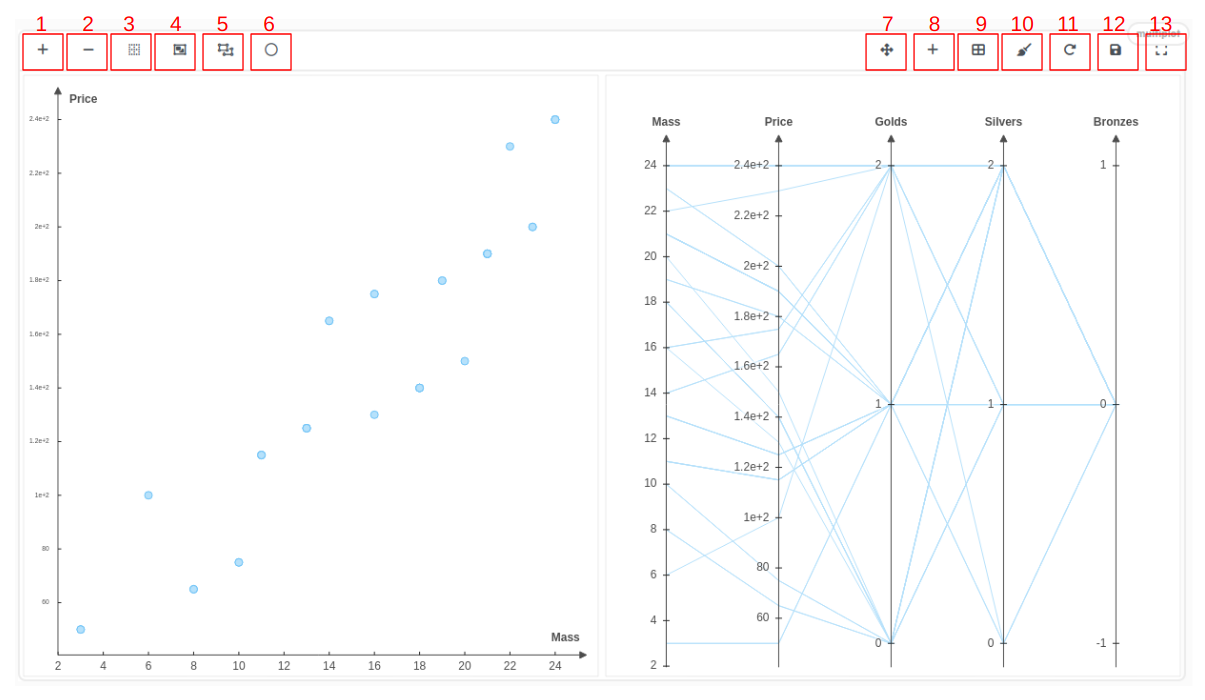
This allows the representation of an object in 2D view, and also can be used to represent the relationship between data on your object (MultiPlot: scatter and parallel plot).
In this part of the documentation, we will explain the second one, MultiPlot.
- Zoom in: Zoom in a particular part of your screen or canvas, making it larger and more detailed.
- Zoom out: Zoom out from a particular part of your screen or canvas, making it smaller and less detailed.
- Rubber-band Zoom: A zoom window, which can be moved around the screen to magnify specific areas.
- Enable selection: Select and highlight specific solutions on the graph (scatter or parallel plot), which can then be manipulated (open in another page, see the different associated parameters, etc.).
- Clear selection: Clear selection and return to the initial state (without selection).
- Enable merge point: Merge multiple data points or elements into a single point, which can help simplify and clarify your visualizations.
- Enable manipulation mode: Handle and edit elements on the canvas (different plots mode), such as moving or resizing them.
- Add plot: Add a new plot or chart to your canvas.
- Order plots: Change the order in which plots or charts are displayed on the canvas.
- Clear all: Clear all elements from the canvas, making it blank and ready for new content.
- Reset view: Re-scale the canvas to its original state.
- Save canvas as image: Save the current state of the canvas as an image file, such as a PNG.
- Enter full screen mode: Full screen mode. It maximizes the canvas on your screen and hides any other distractions or interfaces.
2. CAD View
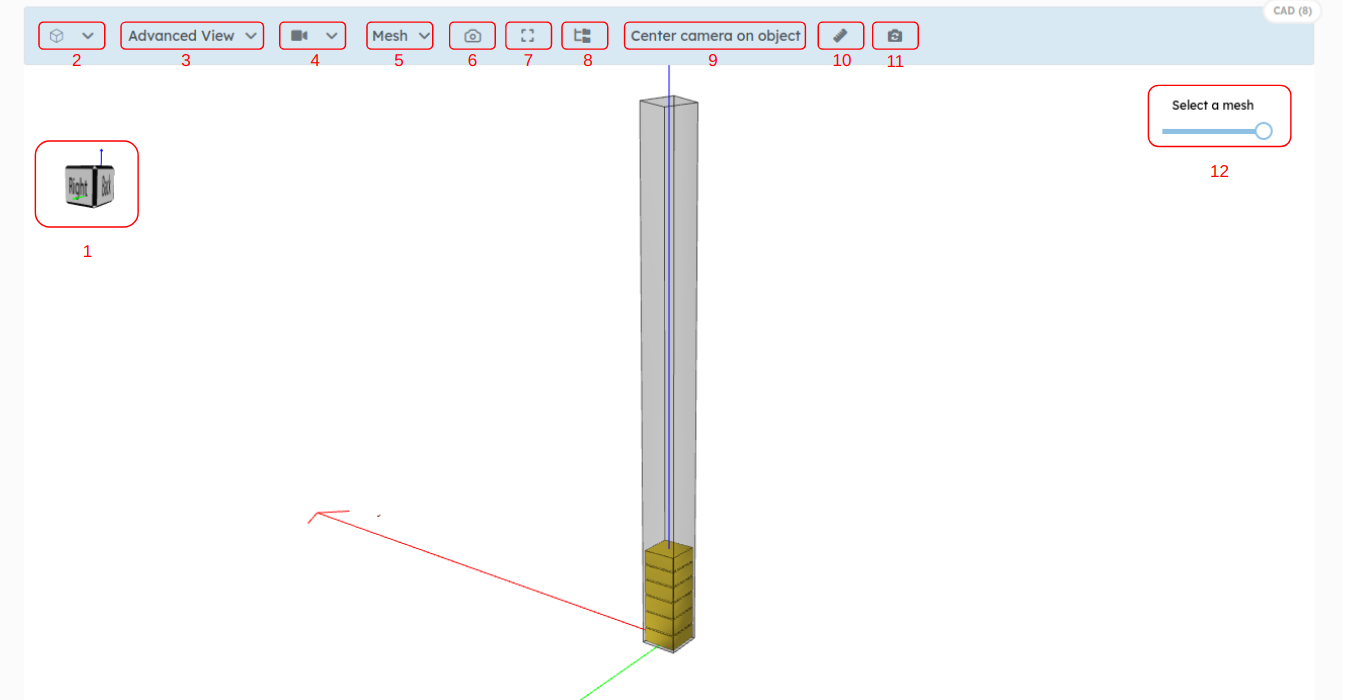
Allows the representation of an object in 3d format.
- View Dice: Change the viewpoint or angle of your display.
- View Menu: Change the viewpoint or angle of your display.
- Advanced View: Provides access to more advanced and customizable view settings, such as Sectional and Exploded options.
- Camera mode: Switch between different camera modes, such as Perspective or Orthographic camera, which can affect how you navigate and interact with your 3D models or scenes.
- Mesh: Change some attributes (color and opacity) of the current selected mesh.
- Screenshot: Take the current view as a screenshot.
- Full Screen: Enter full screen mode, which maximizes the display and hides any other distractions or interfaces.
- Hide/Display Tree: Toggle the display of the scene hierarchy or tree, which can help you better organize and manage your 3D models or scenes. It also gives you more control and your different meshes and enable you to hide/show them, for instance.
- Center camera on object: Quickly center the camera on a particular object or element in your scene.
- Measure: Measure and quantify distances in your 3D models or scenes.
- Cinematic: Turn on and off cinematic effects and camera movements in your 3D models or scenes.
- Opacity slider: Select a mesh and change its opacity on the fly.